Saturday, November 9, 2013

Cutesy Little Miss Purse

Who doesn't remember being small and begging your mom to buy you your first purse? Well.... I don't because I was determined I wasn't going to be the "girly girl" but that's another story, lol. I stumbled upon this adorable pattern by red heart and I couldn't help but make this little purse for my little niece.


I told you didn't I, is it cute or what? This took me a grand total of an hour AND I was working around 3 crazy children (aged 3-10). I'm not sure where the flower pattern came from, but I'm almost positive it's an Irish Rose. I made it last year and it's been sitting in my project box waiting for a good home. :)

Thursday, November 7, 2013

Color Schemes

I do a lot of crocheting. It started as a hobby, quickly became a habit and is now an almost obsession. There are obstacles in my way constantly with this craft i.e. skill level, different yarn and needle requirements, amount of yarn.... etc. But the key is always to improvise right?

Alongside crochet, I dabble in a bit of cross-stitch, sewing, and more recently quilting. What do all of these things have to do with my post title? Simply that I have had quite a few people message me and tell me that although my stitching is good and (some) of my projects are passable, they are not always nice to look at.

Some of my projects are intended for myself, others are destined for greater places, but all are made to fit someone's personality. Usually when I start a project for someone I have them go over everything from the hook size to the finished size. I do this because what I am creating for them should be a one of a kind piece and should reflect them in every way. If they were getting something that I made to my tastes instead of theirs they could easily go to any store and buy something already made.

Not all the time do I agree with others about colors and what-have-you's, but I have to remind myself that this is is going to be someone else's gift and I will only have to look at it for a while. Question for this post, do you think it's ok for people to have such an opinion bout what you are creating for them, or should you do it to your own tastes?

I look forward to reading your comments. :)

Wednesday, November 6, 2013

Imperfections

Have you ever worked hard on a craft only to find out once you're almost (or already) finished that you made a mistake? What is there to do.... well, a few things come to mind.

#1. Leave it as is and ignore it
#2. Try to fix it as soon as possible
#3. Undo all the work you've done and fix the problem

My favorite is to try to fix it as soon as possible. Although there are occasions where you simply have to leave it and move on or take all the other work out to redo it. I hate that. :/ Below are a few samples of my mistakes, both in sewing and crocheting.


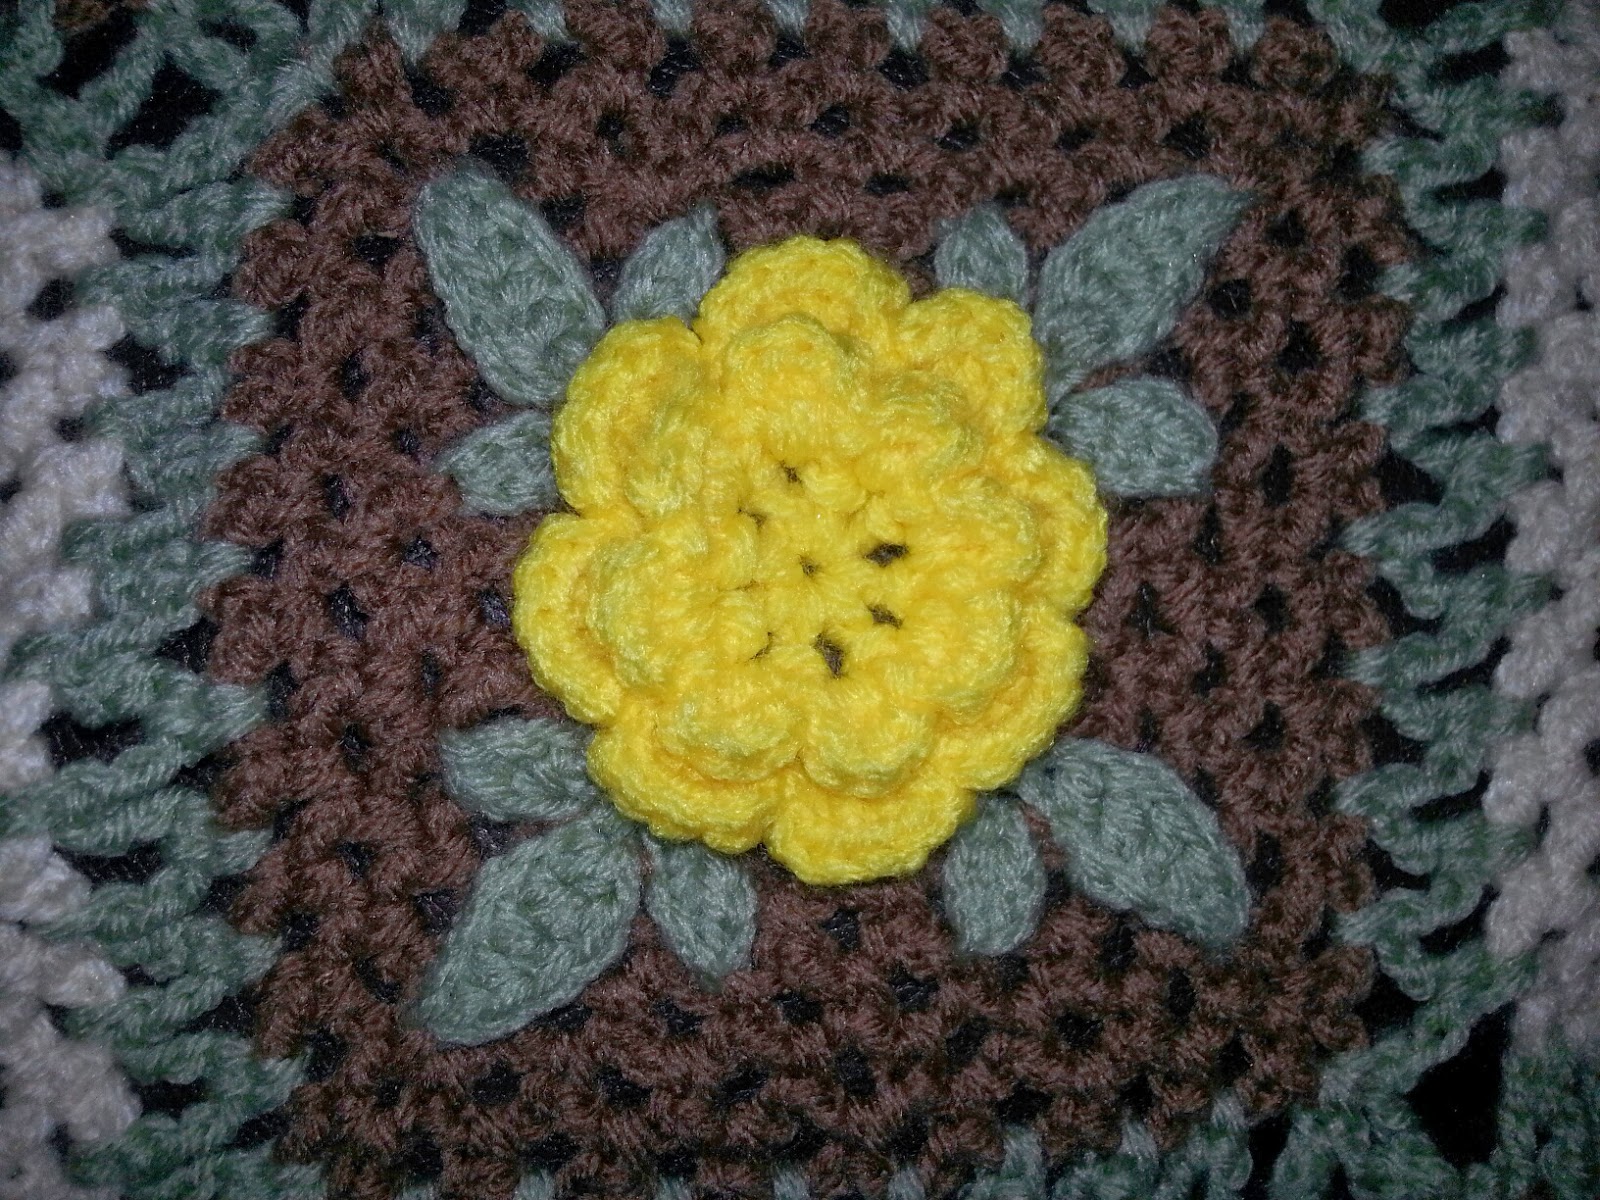
In this photo I crocheted an Irish rose square (you can find the pattern on another post on here) and you can see where, on the bottom right corner, I forgot to crochet one of the smaller leaves. I noticed this on the second row of the brown and by then I had done a bit of work and had a 2 yr old running crazy so it was so much simpler to just leave it.

Does it look bad? Maybe, but after attaching it to the rest of the blanket I asked a small group of friends to find one imperfection and only 3 out of the 9  people asked noticed it. 


This is another one where I did the exact same thing just in another color scheme and this time in the upper right corner. Both squares are part of the same blanket, yet this one was less noticeable than its predecessor.


This one is from the recent quilt I have been working on. My fiance bought me a sewing machine last week and this was my first attempt using it. All of this quilt is hand stitched except for this one strip. As you can see it is smaller on the top than the bottom, and the question is what to do about it. There are three answers to this question and I will tell you which one I will be doing.

#1. Cut both edges down until the whole quilt line is even with this ONE strip of fabric
#2. Pin it from the back and stitch it together until the bottom and top are even
#3. Allow a bigger seam allowance on the larger end of the fabric to get an even row

If you guessed #2, then you'd be correct. Unlike my crocheted squares, this one has to be fixed in order for the quilt to be pieced together properly. Numbers one and three might work, but look at how much of my blocks would be lost just to fix this one imperfection. That's a lot.


After completing my blocks I was so excited to start adding my filler fabric, that I completely "framed" this block. As you can see from the top, this was not a smart move. The fabric puckers and refuses to lie straight. There is no leaving it be nor fixing it later because when I add my side filler to the remaining blocks this fabric will pucker even more.

So, what's left to do.... you guessed it, take it out and redo. I was not happy, like I said, all hand stitched, but for the sake of the quilt it had to be done. I admit I did the wrong thing, but at least I know that my blocks will look good framed. :)

I really should make a sample of any project before I start it, then maybe I wouldn't be having all of these happy accidents. Oh well I like learning on the go, you don't get a practice swatch at anything else in life now do ya? :D

Just a nice filler picture :)

Now you have seen all three course of actions in two different types of crafts. Sometimes it's just easier to leave it, especially when you have a forgiving project such as the crocheted square. Other times it's better to fix it later as with the sewn fabric, and at others it's best to undo and redo. :) The choice is really yours.

Just remember that you will ALWAYS see your own mistakes, even when others don't, but it is the imperfections that make it so special to the one's that receive it. I should know, my Nana crocheted me a twin sized blanket when I was small. The yarn is different weights, there's a multitude of colors, and it's a bit uneven on the sides, but it's my most prized possession.

There is never a right or wrong way to any craft, there are loop holes to anything you want to do. Never be afraid to make those mistakes.


Tuesday, November 5, 2013

Roses of Ireland

I started this blanket in the summer time and I finished it some months ago but never got around to taking pictures. The blanket was meant to be a lapghan, but ended up going to a 6 year old so it worked out fine. :) Well, lets get started shall we?

I followed this pattern, but left off the scallops and single crochets because I really liked the open look and I didn't really want a "frame" around it. Maybe I might go back and follow the pattern exactly, but maybe not.

To begin with, I made the center "rose". It looks something similar to the following picture....


Then I crocheted the leaves, these were actually the easiest part for me. :)


As you can see, the next step is to add the background. You can tell where I added one petal to many to my first flower (this was the first square made) but as I kept going I got better....


This is the second square I made. I used a light brown, not white, so it would blend nicely with my dark brown. You see what I mean about keeping the flower as the focal point and not "framing" it with all the extra?


So this was the last picture I took while I was working on it. If I can ever find what I did with the final result picture I'll post it on here. :(

As you can see, I joined my squares with the same color as the leaves. #1 I had more of the green left over than any other, #2 I thought it made it look more like a garden and the green wasn't as overwhelming as any of the other colors would have been. I joined them as soon as I finished each block.... I'm not sure if that counts as a join-as-you-go or not, but it made things much simpler.


I wish I could give you my pattern for how I joined these, but I really don't remember. I just made it up as I went. I wanted it to keep that open look it had from the background so I just made up a stitch and when I saw that it worked I kept it. :)

I really should have made a sample pattern of this before I started, but I was so eager to get going that all my mistakes are right there in the blanket for all to see. This really is an easy pattern and it works up great. It's perfect for any season and you can use any color scheme you want or stick with only one. That's what sold me on this project because I have a hard time joining my colors, but this pattern makes it so easy. :)


11/9/2013: Recent photo update....

This picture was sent to me by my ever loyal best friend so that I could show you what the finished project looked like.... :)

Isn't it darling!