Tuesday, November 18, 2014

Charm Pack Tote Bags


I'm a simple person, I like simple things. About 2 years ago I received a beautiful purse for Valentine's Day. Thanks to daily use, an active toddler, and our living room chair, I now am bag-less. Being that I'm 6 1/2 months pregnant, I just figured I'd use the baby's diaper bag as mu purse as well. That didn't go over so well, diaper bags today are a joke. Anyway, I decided to give making my own a try.
 
As you may know, I adore Missouri Star Quilting. I buy all of my supplies from their website and Jenny is my go-to for tutorials on YouTube. I found her video for these bags here. The taller of my bags followed her video exactly. With the smaller one, I improvised. Here are a few pictures, front and back, of each tote.
 
Front

Back

Front

Back
You're probably wondering how I can tell the front from the back on each bag? Well, on each bag, if you look at the upper right corner on the back you'll notice it bunches up. I'm not sure why this happened, it's not on a seam or anything, but it's occurred on both bags. Maybe I just didn't pull the bag through far enough, I dunno.
 
The second bag has only 2 differences from the first really.
#1. I "stitched in the ditch" instead of doing the quilted lines. I really just wanted the fabric to be the showcase.
#2. THE HANDLES!!!! I cannot tell you how much I stressed over the handles on the first tote. All I did differently this time was to sew 5 precut 5" squares together, then follow Jenny's instructions.
 
There you have it, my little charm totes. The first one, I admit I mis-measured and that's why the bottom is so big, is big enough that my sister uses it to carry her books and notes between classes. The second one is like me, small and simple. I'm able to fit my keys, wallet, and my books inside it. C'mon, who doesn't leave the house without a good book?
 
My only complaint? Since Jenny did not add a button or zipper enclosure, neither of these have one. I would love to be able to keep these secure, but I'm not stressing over it to much. I hope you all enjoy making these cute tote bags. They really are simple to make and are slightly above a beginner level. After the first one is made, the rest is cake.
 
Have fun, and as always, happy crafting everyone!

Friday, October 3, 2014

Making a Come Back.... Soapbox Style

Hello again my lovelies! My oh my has it been a long time since I've written to you! There has been so much going on since my last post, A LOT of nausea for one and trying to find good quality baby furniture at better quality prices. As I got caught up in day-to-day life, I fear I have neglected you all and I'm here to make it up to you.

For those of you who know me, I'm pretty much your average stay-at-home mom. I love all of my babies and I'm beyond excited to welcome our newest edition next year. There are so many things to create, so many books to read, and so many memories to store away for my future self. One thing has become constant in my life though, and that is joy. Oh you can be an unhappy person, but true joy is what I'm talking about.

I discovered a few years back that no matter what life throws at me, I'm not going to stay down. If I have an argument, I say what I have to an then move on, I see no reason to stay angry about something I've already argued over. Sure, things bother me.... I'm not Wonder Woman. I've just learned that I only really need very little in life. All of those emeralds and rubies are beautiful and all, but small things like my kids buying my favorite books for me brings me more joy than those gems ever could.

Many of you may or may not know that I'm still attending school. At 24, this isn't a big surprise, but I didn't decide to go back for me. I decided to go back for my youngest son. There are things I need to teach him, important life lessons that I fear the past few generations have failed to pass on. My son needs to see that in this world of instant gratification, there is nothing worth getting if it's not earned. Life is not a handout, and I feel it is my responsibility to teach my son the importance of hard work.

My past is my anchor, keeping me grounded with all of the good experiences as well as the bad. The good gives me strength while the bad motivates me to push harder. Will all my hard work be worth it? Absolutely. Whether my children choose to follow my lead or not, I can rest easy knowing I did everything in my power to guide them in the right directions, and that ladies and gentlemen, is real joy.

Well, it's about that time when I have to wrap up my tale, publish this blog and get on with the rest of my day. Before I go, I'd like to say one last thing. Even if you find yourself in the darkest of darks, the lowest of lows, or you simply think I'm talking nonsense, just remember that there will always be a reason to push forward and keep trying. If you haven't found your joy, then it's time to move on to something else. Life is to short to waste one precious breath on negativity.

Goodbye my darlings, and as always, happy crafting everyone.

Wednesday, June 4, 2014

Bookshelf Curtains


Anyone who knows me knows that I value my books above all of my other material possessions. I own more than one bookshelf in my home, and both are filling up fast. With all of these books I am always on the lookout for new ways on how to care for my books.

For those of you who have read my blog before, you will remember that I purchased books from my local thrift store where the spines had a line drawn in marker. I was on Google trying to find a way to rid my precious books of these unsightly marks when I stumbled across a webpage that explained how light was the #1 cause of damage to books. (I would have guessed children where the #1 cause) So, I set off to make to explore ways to keep the light, especially natural light, off of my books. That's when I came up with the idea for bookshelf curtains!


I stared with 2 yards of fabric, measured out the size I wanted the curtain to be, and cut. I know that the selvage is meant to be cut off, but I really don't mind it so much. I'm only going to fold all f the edges down and sew them so it makes no difference to me on projects like this one. I could have easily cut the fabric down so that I wouldn't have so much hangover, but I think some nice embroidery or applique on the top will bring it all together.


This fabric was featured in another blog as part of my "new stash", and I just can't get enough of it. The pattern is so simple and retro, while the texture is simply divine! I loved working with this fabric and even saved enough to make an adorable baby skirt, which I hope to post soon.

There is one area that is still up for debate. My husband pointed out that since the fabric is white, the light can still penetrate and reach my books. He suggested adding a liner to my fabric. Either cotton on the back, or lace in the front; something to give it that extra layer of protection. I, on the other hand, think it looks great just the way it is.

What are your thoughts on my new curtains? As always, your comments are welcome and appreciated. I look forward to reading what all you have to say. Happy crafting everyone!

Tuesday, June 3, 2014

New books

My son and I, I was reading Her Dark Curiosity

Although this post has nothing to do with crafting, I felt I still had to write it. Reading is all about imagination, and that is what we all need for our crafts. Well.... that, and creativity, but let's not over think things Haha. I do have to mention that these are not all of the new books I have acquired, just the ones I have photographed.

4 for $1.00
I purchased the above books at my local thrift store, and yes, I am appalled that they had the spines like this when I purchased them. The cashier informed me that there are people who bring in their books to read while others shop form time to time so they needed a way to prove that no one was stealing. I haven't found a way to remove the markings without damaging the books, so I plan to leave them like this until they wear off..... I hope.

Out of these books, I have already finished A Rogue of My Own and have been working on Harstairs House.


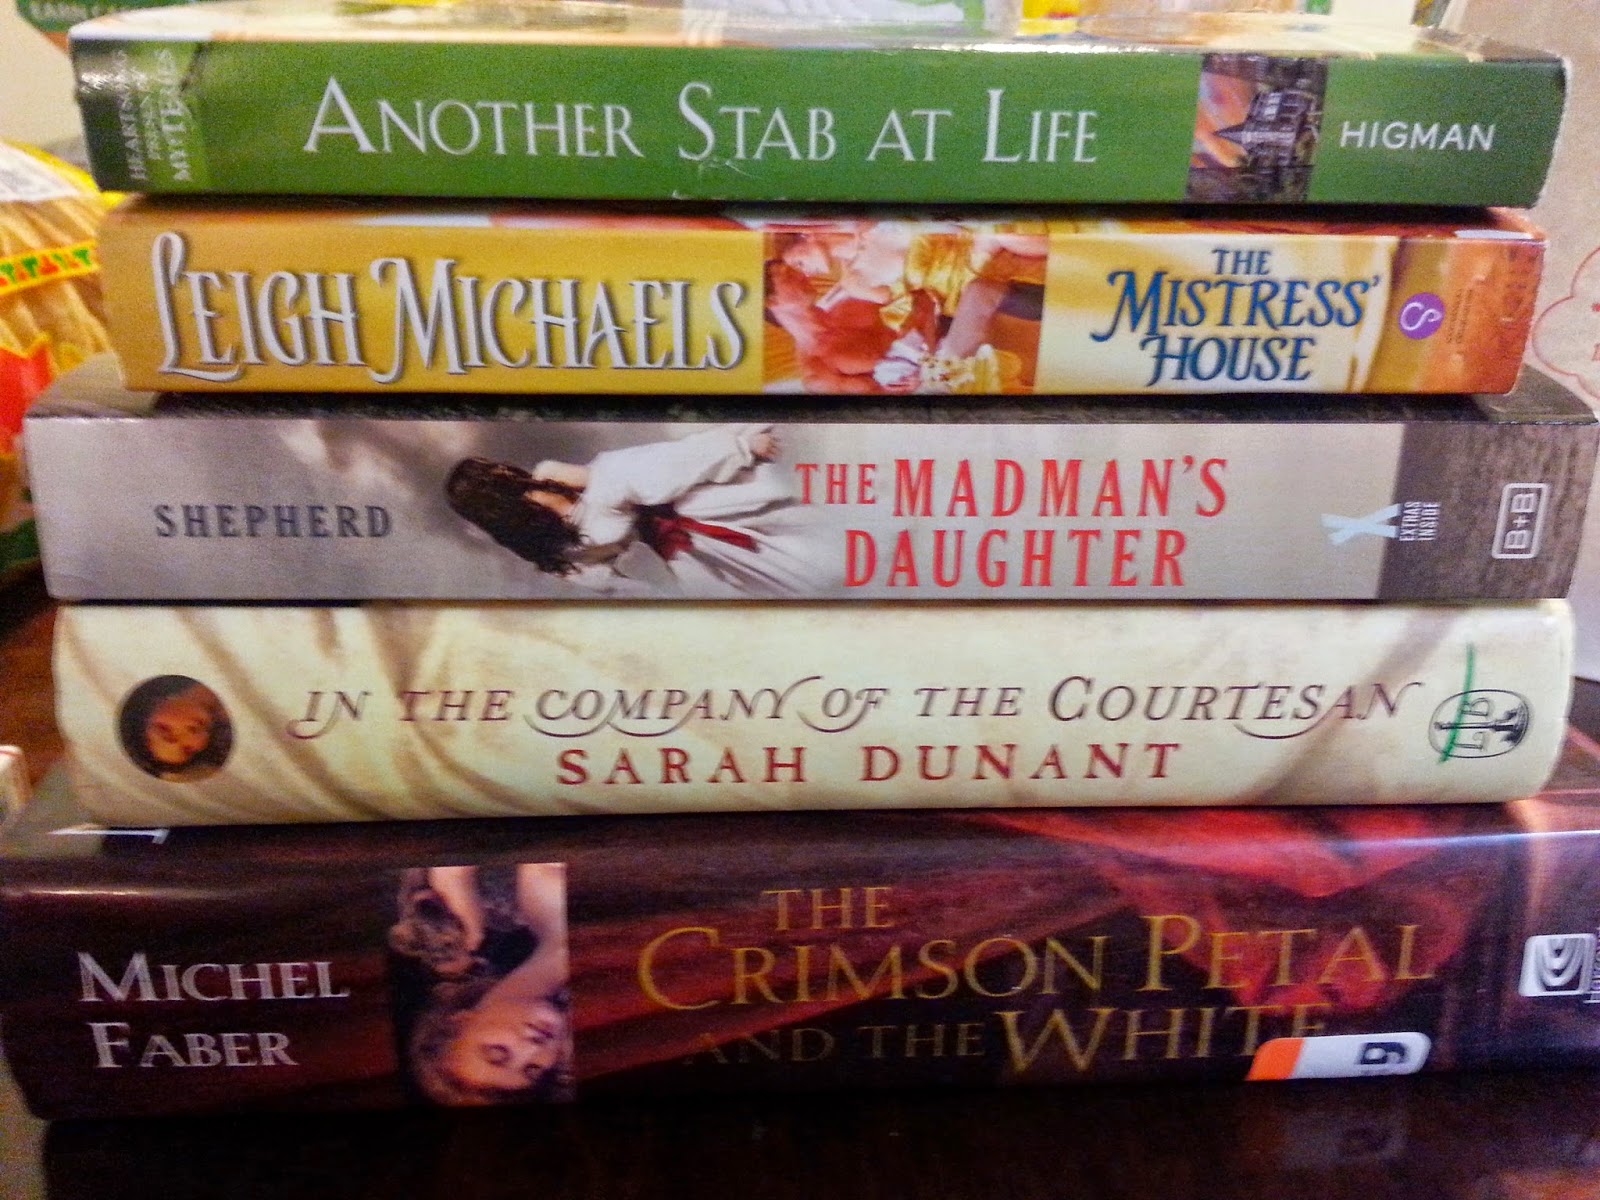
 These are the books I received for my Birthday / Mother's Day (they were only a few days apart this year). I have finished The Madman's Daughter as well as Another Stab at Life, and am currently working on The Mistress' House. 

Believe it or not, but the first two on this stack are from my local Family Dollar. Shepherd's book is from Amazon, and the last two are from Albiris. The last 3 are all used books, but you really can't tell as they are in excellent condition. I'm waiting for my last shipment of books to come in, and when they do, I promise to post more pictures.

Monday, June 2, 2014

New Stash

With all of my quilting projects tucked away inside my head, I decided I needed to get a bit more fabric if I was to continue uninterrupted in my work. So let's begin on our journey through my new stash of fabric.


I really hope you can see the texture in this cherry fabric. I purchased 2 yards of this for two reasons:

#1. It reminded me of those dresses the ladies wore in the 1950's
#2. I thought it would be perfect for my bookshelf curtains


Isn't this star fabric just adorable? I'm not sure if I want to use it for the backing of my next baby quilt or as part of a bag. Either way, I have 2 yards to do with as I please.


I purchased 2 yards of this fabric with my 12 year old son in mind. He's been very into astrology and all that goes with it so when my daughter pointed this out to me, I knew I  had to buy it for him.


This charm pack is called Lumina Jewel


What is with the above three photos? Well, my next project involves the 3 of them. I purchased a charm pack of solid black 5" squares and to complement them I purchased a charm pack of 5" squares from Robert Kaufman Fabrics.  The butterfly fabric is going to be the backing for these charm packs.

As for the lace.... my plan is to add it to the edge of my quilt under the binding. My Nana has warned me that this will make the quilt VERY dark, but I think I'm ok with that. All of the quilts I'm seeing these days are white and bright, I want something that is dark without being Halloween-y. With a Wiccan little sister and a "Walking Dead" crazed daughter, I wanted this to be inspired by them.

As always, your comments are appreciated and I look forward to your opinions on my work. Happy stitching all!

Sunday, May 25, 2014

In A Day Baby Blanket


I was so frustrated by my failed bookshelf curtains that I decided to take out all the work I had done and just sew it all together to make a newborn quilt. Just like everything else in life, if you start it under one mood that is what you will get. I had nothing but problems with this quilt and I want to focus on those mistakes so that both myself, and you the reader, will be able to learn from my mistakes. Let us begin....


I'd like to start off with my binding strip. I opted to make my own as I have done before. All I do is take the 5" charm packs and cut the squares in half. Now, if you do not know how to make a proper binding strip, let me be the first to tell you that the above picture is wrong. All binding strips must be sewn together using a 90 degree angle, not end to end. If you use the above method you will get bunches and catches, both in machine and in hand sewing.


Above you will see my quilt top sewn together and lain flat. At this point I had not ironed it, nothing. This is straight off of the machine. At this point I have to say that I was a bit pleased with myself to see it look as good as it does considering the squares are 2.5" and I'm still not accustomed to my machine. Fast forward.....


....My quilt top has been ironed, the "sandwich has been made, the stitching has been stitched, and the excess has been trimmed. It was at this point that I noticed that some of my blocks didn't match up, my edges are wonky, I forgot to iron flat a seam row from the previous picture, and there are plenty of squares that don't look as whimsical as I would like. I think only one good thought at this point, at least my quilting looks good on the top.

Zoom to read "The line which my stitching should be on."

Which brings us to here. You can see that I have pointed out that I actually missed a line. I used a vine patterned stitch and stitched every other line to both vertically and horizontally. I did this for two reasons.

1. To keep from over quilting
2. To give it a 4 square spacing

There was also the problem of my backing bunching in a few places, but I didn't show you that because I'm not overly concerned with it. Even the most seasoned quilter has the occasional issue with the backing bunching under the quilting process. This is an issue more frequent in machine quilting.

I would love to hang this quilt on my wall as a reminder of my failure, a way to push myself to do better, but my husband has a better option. He has opted that I donate my quilt to one of the many homeless shelters that offer aid to women with children. He brought it to my attention that although many will pass up my quilt with an air of disgust, those women will embrace it as the blessing it is.

Saturday, May 24, 2014

Granny's Favorite Flowered Blanket (Crochet-In-Progress)

Hello again, today I want to show you another one of my "in progress" items. This one is a crocheted blanket that I have been crocheting, on and off, for a few months now. I'm calling it Granny's Favorite Flowered Blanket. I know that reads like a mouthful, but it's inspired by my mother who is now known as Granny.


In an earlier post, I showed you my version of an  Roses of Ireland square and the same process goes into this blanket. I opted out of making the leaves and went straight into the background. I'm not to keen on my joining stitches though (explained in the earlier blog post as well). Either way, what's done is done right?


Here is a close up of my squares. I attached them with different colored yarn simply to use up scarp yarn. Haha I'm just going along with this blanket to see where it leads me The only thing I know for sure is that it'll be a rectangle with flowered squares in the center.

Happy Hooking Everyone!

Thursday, May 22, 2014

Projects I Forgot To Mention

I have 2 projects worth mentioning today....


Above you will notice that my 4 beautiful children made mothers day gifts. 2 of them made butterflies out of feet, my youngest made a butterfly out of his fists, and my eldest made a jar of fireflies. So much crafting!
They really had a great time making all of these.

My son was not happy that he had to model

We come down to my crochet creation which is a toddler hat. It's made from Red Heart yarn in Aran and Claret. The hat was made using a size I/5.50 mm hook and the rose used a H/5.00 mm hook. The hat I just made up as I went along, but you can find the rose pattern literally everywhere. Just type it in your search engine and go.

Friends, please forgive me for not posting. I was blinded by Google+. They had cookies and cool milk and I let it get to my head..... Haha. Actually, I was to eager to get some love on my newest creations that I failed to post anything about them for you guys. You have my word that it will not happen in the future, I hope.

As always, I look forward to your comments and your feedback is always welcome on my posts. I look forward to seeing what you all have come up with and please enjoy my pages. Hopefully you'll notice that my work is finally starting to improve.

"Kites In The Breeze" Quilt-In-Progress

Pardon my absence folks, I've had quite a few things on my plate since my last post. Between school, kids, husband, and "the big move", I thought it best to take a few moments in between projects for a while. Now I think it's time to get back into the swing of things.

I found this great website Missouri Star Quilting, and took advantage each time I saw one of their amazing "Daily Deals", and I invested in the 5" precuts mostly. My plan was to make the X's and O's quilt (also by Missouri Star Quilting) based off of the free pattern that I was given, upon my first order, and the YouTube video I found at which you can find the link below.

This quilt will be the size of a Twin XL or a nice lap blanket.

So here is my quilt thrown up against my couch and you can see that I've just sewn those squares together and then I've used safety pins to pin the "quilt sandwich" together. I know there are basting sprays and all out there that will do the job of the pins, I have used them all before and although they work great, they bother my breathing to much to use on bigger quilts such as this one.


So I want to show you why it's called "Kites in the Breeze" and explain why I chose kites of all things. I noticed that when sewn together this quilt had a bright Spring/Summer-y feel to it and I want the quilting to feel the same way. I went over so many ideas in my head, but nothing felt right. As I slept that night, I dreamed of sewing kites onto the blanket and I knew that was the stitching I should use. The next morning I began working on my kites.


In this picture I want you to get a closer look at my stitches. Although I can easily work this up on my machine, I'm opting to hand stitch these kites on. I've been using a simple running stitch, and for the kites bows I've been using an embroidery stitch known as the "lazy daisy" stitch. It's simple to make and actually pretty fun. I've posted a YouTube link below for those of you who aren't familiar with this stitch.

There you have it, my Quilt-In-Progress that I hope to have finished before long. I look forward to your comments and as always, your feedback is important to me. All of the links are posted below and I'm eager to have this quilt finished for you all to see.


Wednesday, April 2, 2014

I'VE GONE DRESS HAPPY!

The title is an understatement, I'm in so much love with these dresses that I can barely contain me happiness! What makes me so happy about these dresses? There are a few actually....

1. They are the simplest dress I have ever tried to make.

2. C'mon, they're adorable and you know it.

3. This is the first dress pattern that I have been successful in following the pattern through and having the end result look the way it's meant to look.

If you are interested in making one of your own, you can download the free pattern here: http://www.ravelry.com/patterns/library/easy-baby-sun-dress, though I do have to tell you, on row 3 it's meant to read "dc into the next 10 dc", but she has written 12.


Above me you see a baby dress made of Lion Brand yarn and a 3.50 mm crochet hook. It worked up to be a newborn size. I worked the first row of clusters in the white I used for the bodice and ruffle just to give the bodice a bit more length and a deeper look to it. The newborn size is also a perfect fit for most baby dolls!

Below you see the same pattern worked up using a 5.00 mm hook and Red Heart yarn. I had a request from my cousin to make a "hunting party" dress for her 3 month old, it didn't hurt the fact that I loved these colors so much together. :)


Making these was a big step for me, my skills have never been advanced enough to get this far. After so many failed attempts at trying to create beauty with my crochet, I settled for just making the easy and bland. Although this pattern is very simple, the fact that I witnessed me skill improving before my eyes was an amazing feeling. I also overcame my fear of failing at this pattern. Not only that, but I came to a part in the pattern that I discovered was a miscount ( as you've already read ) and I was able to figure out my next step on my own. Not a big deal you say? A HUGE leap for me.

I hope that each and every one of you that stumbles across this post attempts this pattern. Even if you have no females in your life what so ever. Make one and donate it to Goodwill. The mothers are always thrilled at these dresses and you'll be making something meaningful. :)

Happy Crocheting!

Monday, March 24, 2014

Over Quilting?

Craftsy.com is a wonderful website for quilting patterns as well as tutorials, yet I've noticed a trend among quite a few of the patterns. Over quilting. I know, I know, there is no such thing as over quilting. Well, all of my creative flow stems from the river known as Nana. She was born during the 1930's and believes that simpler is always better.

A setting mat with a leaf stitch

Ok, I used a decorative stitch from my sewing machine that I have dubbed the "leaf stitch". I went all across the border, from corner to corner, as well as down the middle from the top and across the middle. I used a lavender thread and it looks kind of pretty in my eyes. Now, I will show you a picture of a quilt I love to look at, but feel it was over quilted.

Named the Fishy Baby Quilt

As you can see, the quilting has taken away from the actual quilt.You can not see what the material is without really looking at it, all you can see is a bunch of circles. Maybe this was the creators intentions, if so my apologies for using your creation as part of my example. I just don't see the point of going through all the trouble of cutting and sewing all these pieces together just to cover them up with SO MUCH STITCHING.

Maybe I'm just in a sour mood about my painfully obvious beginner status on quilting, but it just bothered me a bit to see so much clutter on a quilt. I'm like my Nana, the simpler the better. Rather a clean quilt that a busy one.

As always, your thoughts and comments are welcomed and even encouraged. Happy Crafting!


Sweetie Spring Purses

Instructions found here! :)

Excuse my poor flower, It was redone after this picture was taken


The above pictures are from a crochet along found on Google+, It was so east to work up being that it is worked up of only double crochets, but the real fun came from the folding! I sewed the ends together to make 2 pockets. Great for those smaller girls in your life.


This adorable red bag is made simply by making a granny square and then double crocheting a border.
Crochet it as big as you wish, fold it in half and single crochet up the sides. Once you reach the end of one side, continue making single crochets for your handle. Attach to the other side and sew in your seams once completed.
Sew in your lining once you're done and you have an instant purse for your little one. :)


This one is by far my favorite. It is made the same way as the red bag with 2 differences.
#1 When double crocheting your border, chain a few stitches for your button hole
#2 Attach a button to the opposite side of your button hole.
It couldn't be simpler. :)

As always, I look forward to reading your comments and feedback is always welcome on my posts!
Happy crocheting!

Sunday, March 23, 2014

Ponderings On Crochet Hooks

Size H/ 5.00 mm

I bet you've never given much thought to crochet hooks. They serve their purpose in our crafts, and as long as our gauge swatch comes out the way we want what difference does it make really? 
I was one of those people until about a month ago....

After an extended stay at my grandmother's house, or Nana as we like to call her, I got into a conversation with her about a project I was working on. Once the conversation got well into way, she started reminiscing on her days as a crochet-er. My project was quickly forgotten as I listened with appreciation to the stories she had to tell. It was towards the end that she paused, asked if I'd like to see what she meant about my crochet hook being my downfall, and proceed to make her way to her bedroom. After what seemed like an eternity, she emerged.

In her hand was a small package containing crochet hooks from different countries and were all different sizes. She shuffled through them until she came upon the hook in debate. It looked like any other hook I had seen, except that the head had a deeper and narrower valley than what I had grown accustomed to. We finished our conversation and she gave me a challenge: Finish 2 projects, one from each hook, and then give my honest opinion about the hooks. I couldn't resist. :)

The sun was created from my Nana's hook, the sad excuse for an owl was from mine.
I set off with 2 patterns, different in difficulty, but equal in time consumption. The hook I was used to using was great. There was no more complaint than my usual, my stitches were sometimes to tight and others to loose, I sometimes pulled up my loop through a strand of the yarn instead of the complete stitch, etc. I was quite pleased with my new little toy. Onward to hook two!

Hook 2 was my Nana's from 50 years ago. We have no idea who the manufacturer is, only the size and that it was made in the USA. I will admit that I was apprehensive at first, but I had been crocheting for almost 6 years and working up things that my Nana could only look at with envy. Surely my hook would win. Oh how wrong I was. Her hook glided through the stitches, never tangled or stripped my yarn, and during the few times that my stitches were to tight, the head was at a perfect angle to glide through those tighter stitches. My hook died a horrible death that day.

I've tried several other projects with my own hooks, and am still reminded of the gentle glide of my Nana's hooks. Those hooks glided through my stitches like a warm knife through butter. My opinion has changed, as well as my desperate pleas to win those hooks from my Nana. :) If any of you happen to come by these older crochet hooks, my advice to you would be to snatch them up at whatever price is being offered for them!

Saturday, November 9, 2013

Cutesy Little Miss Purse

Who doesn't remember being small and begging your mom to buy you your first purse? Well.... I don't because I was determined I wasn't going to be the "girly girl" but that's another story, lol. I stumbled upon this adorable pattern by red heart and I couldn't help but make this little purse for my little niece.


I told you didn't I, is it cute or what? This took me a grand total of an hour AND I was working around 3 crazy children (aged 3-10). I'm not sure where the flower pattern came from, but I'm almost positive it's an Irish Rose. I made it last year and it's been sitting in my project box waiting for a good home. :)

Thursday, November 7, 2013

Color Schemes

I do a lot of crocheting. It started as a hobby, quickly became a habit and is now an almost obsession. There are obstacles in my way constantly with this craft i.e. skill level, different yarn and needle requirements, amount of yarn.... etc. But the key is always to improvise right?

Alongside crochet, I dabble in a bit of cross-stitch, sewing, and more recently quilting. What do all of these things have to do with my post title? Simply that I have had quite a few people message me and tell me that although my stitching is good and (some) of my projects are passable, they are not always nice to look at.

Some of my projects are intended for myself, others are destined for greater places, but all are made to fit someone's personality. Usually when I start a project for someone I have them go over everything from the hook size to the finished size. I do this because what I am creating for them should be a one of a kind piece and should reflect them in every way. If they were getting something that I made to my tastes instead of theirs they could easily go to any store and buy something already made.

Not all the time do I agree with others about colors and what-have-you's, but I have to remind myself that this is is going to be someone else's gift and I will only have to look at it for a while. Question for this post, do you think it's ok for people to have such an opinion bout what you are creating for them, or should you do it to your own tastes?

I look forward to reading your comments. :)

Wednesday, November 6, 2013

Imperfections

Have you ever worked hard on a craft only to find out once you're almost (or already) finished that you made a mistake? What is there to do.... well, a few things come to mind.

#1. Leave it as is and ignore it
#2. Try to fix it as soon as possible
#3. Undo all the work you've done and fix the problem

My favorite is to try to fix it as soon as possible. Although there are occasions where you simply have to leave it and move on or take all the other work out to redo it. I hate that. :/ Below are a few samples of my mistakes, both in sewing and crocheting.


In this photo I crocheted an Irish rose square (you can find the pattern on another post on here) and you can see where, on the bottom right corner, I forgot to crochet one of the smaller leaves. I noticed this on the second row of the brown and by then I had done a bit of work and had a 2 yr old running crazy so it was so much simpler to just leave it.

Does it look bad? Maybe, but after attaching it to the rest of the blanket I asked a small group of friends to find one imperfection and only 3 out of the 9  people asked noticed it. 


This is another one where I did the exact same thing just in another color scheme and this time in the upper right corner. Both squares are part of the same blanket, yet this one was less noticeable than its predecessor.


This one is from the recent quilt I have been working on. My fiance bought me a sewing machine last week and this was my first attempt using it. All of this quilt is hand stitched except for this one strip. As you can see it is smaller on the top than the bottom, and the question is what to do about it. There are three answers to this question and I will tell you which one I will be doing.

#1. Cut both edges down until the whole quilt line is even with this ONE strip of fabric
#2. Pin it from the back and stitch it together until the bottom and top are even
#3. Allow a bigger seam allowance on the larger end of the fabric to get an even row

If you guessed #2, then you'd be correct. Unlike my crocheted squares, this one has to be fixed in order for the quilt to be pieced together properly. Numbers one and three might work, but look at how much of my blocks would be lost just to fix this one imperfection. That's a lot.


After completing my blocks I was so excited to start adding my filler fabric, that I completely "framed" this block. As you can see from the top, this was not a smart move. The fabric puckers and refuses to lie straight. There is no leaving it be nor fixing it later because when I add my side filler to the remaining blocks this fabric will pucker even more.

So, what's left to do.... you guessed it, take it out and redo. I was not happy, like I said, all hand stitched, but for the sake of the quilt it had to be done. I admit I did the wrong thing, but at least I know that my blocks will look good framed. :)

I really should make a sample of any project before I start it, then maybe I wouldn't be having all of these happy accidents. Oh well I like learning on the go, you don't get a practice swatch at anything else in life now do ya? :D

Just a nice filler picture :)

Now you have seen all three course of actions in two different types of crafts. Sometimes it's just easier to leave it, especially when you have a forgiving project such as the crocheted square. Other times it's better to fix it later as with the sewn fabric, and at others it's best to undo and redo. :) The choice is really yours.

Just remember that you will ALWAYS see your own mistakes, even when others don't, but it is the imperfections that make it so special to the one's that receive it. I should know, my Nana crocheted me a twin sized blanket when I was small. The yarn is different weights, there's a multitude of colors, and it's a bit uneven on the sides, but it's my most prized possession.

There is never a right or wrong way to any craft, there are loop holes to anything you want to do. Never be afraid to make those mistakes.


Tuesday, November 5, 2013

Roses of Ireland

I started this blanket in the summer time and I finished it some months ago but never got around to taking pictures. The blanket was meant to be a lapghan, but ended up going to a 6 year old so it worked out fine. :) Well, lets get started shall we?

I followed this pattern, but left off the scallops and single crochets because I really liked the open look and I didn't really want a "frame" around it. Maybe I might go back and follow the pattern exactly, but maybe not.

To begin with, I made the center "rose". It looks something similar to the following picture....


Then I crocheted the leaves, these were actually the easiest part for me. :)


As you can see, the next step is to add the background. You can tell where I added one petal to many to my first flower (this was the first square made) but as I kept going I got better....


This is the second square I made. I used a light brown, not white, so it would blend nicely with my dark brown. You see what I mean about keeping the flower as the focal point and not "framing" it with all the extra?


So this was the last picture I took while I was working on it. If I can ever find what I did with the final result picture I'll post it on here. :(

As you can see, I joined my squares with the same color as the leaves. #1 I had more of the green left over than any other, #2 I thought it made it look more like a garden and the green wasn't as overwhelming as any of the other colors would have been. I joined them as soon as I finished each block.... I'm not sure if that counts as a join-as-you-go or not, but it made things much simpler.


I wish I could give you my pattern for how I joined these, but I really don't remember. I just made it up as I went. I wanted it to keep that open look it had from the background so I just made up a stitch and when I saw that it worked I kept it. :)

I really should have made a sample pattern of this before I started, but I was so eager to get going that all my mistakes are right there in the blanket for all to see. This really is an easy pattern and it works up great. It's perfect for any season and you can use any color scheme you want or stick with only one. That's what sold me on this project because I have a hard time joining my colors, but this pattern makes it so easy. :)


11/9/2013: Recent photo update....

This picture was sent to me by my ever loyal best friend so that I could show you what the finished project looked like.... :)

Isn't it darling!


Tuesday, October 29, 2013

Newest Project

I have tried to dedicate this blog simply to crocheting, mainly because it is honestly my first love and I'd rather do it than sleep most of the time, but I foresee myself veering from this very soon. As you may or may not know, I have been trying my hand at quilting.... so far it has been simple mini pillows, but I am in the works of creating my very first hand stitched quilt.

I first learned how to do a  running stitch (straight stitch) while in my 6th grade art class. For one of our projects my teacher showed us how to hand cut, iron, piece, and sew our own throw pillows. I got a 89 which I'm still secretly proud of. After this, I hung up my needle and thread and never tried to sew again until earlier this year when I was determined to crochet a few purses. All of my work is hand stitched, no sewing machine has ever been under my fingers and the work shows it, lol.

I want to post my work here as well without creating yet another blog for this, although I do want to keep my book reviews on a separate page. It's just easier that way. I have all of my mini pillows posted on my Facebook page under the album "Completed Crafts" which you can find here : Click Me! and also on my Google+ profile which can also be found by clicking here : Yoo-hoo, over here!!!!. My ultimate goal is to get so comfortable and to hone this skill enough to make an interlocking wedding ring quilt (by hand) like my Nana used to make.

I do have to give credit where credit is due and thank all of my Google+ friends for dealing with my insane and never ending questions about every step I took to make these, as well as Missouri Star Quilting Company for their brilliant YouTube tutorials.... They are located here. :) Between 4 children (aged 3-11), a fiance, household work, school, writing, crocheting, and as always reading, I have yet another thing to add to my daily regimen.

So, ladies and gentlemen, I bid you adieu with this last phrase.... happy crafting everyone!

Tuesday, September 24, 2013

Back in the swing of things....

Since the move last month everything (save for a few of my books) have remained in their boxes. I have finally unpacked enough so that I can get back to what I do best, crocheting. There is so much I want to do but with a 3 year old, the addition of 3 other children, and a wedding to plan I don't seem to have much motivation at the moment. The good news is that fall is quickly approaching and I can't wait for the cool autumn air as well as all those beautiful colors. Autumn truly is the most inspiring time of the year.

Now, all my preparation and sacrifice will finally pay off and I can pick up where I left off, although I do have some projects lined up. :) I feel I will never be able to get caught up. I have 10 new books on my dresser, 18 on my Kindle, 30 on my e-reader, and 8 projects lined up before the end of the year. I know these numbers will only increase as the year progresses, but what can I do really? *shrugs shoulders* There is so many wonderful things to learn and do and I feel I will never have the time to complete them all.

Wish me luck fellow bloggers/crafters. I am going to need all the help I can get. :)

PS: I plan on using  few weeks at one point to do nothing but improve my skills. I will be making swatches of patterns that are either labeled advanced or intermediate. It is time to branch out and stop playing it safe.