Saturday, November 9, 2013

Cutesy Little Miss Purse

Who doesn't remember being small and begging your mom to buy you your first purse? Well.... I don't because I was determined I wasn't going to be the "girly girl" but that's another story, lol. I stumbled upon this adorable pattern by red heart and I couldn't help but make this little purse for my little niece.


I told you didn't I, is it cute or what? This took me a grand total of an hour AND I was working around 3 crazy children (aged 3-10). I'm not sure where the flower pattern came from, but I'm almost positive it's an Irish Rose. I made it last year and it's been sitting in my project box waiting for a good home. :)

Thursday, November 7, 2013

Color Schemes

I do a lot of crocheting. It started as a hobby, quickly became a habit and is now an almost obsession. There are obstacles in my way constantly with this craft i.e. skill level, different yarn and needle requirements, amount of yarn.... etc. But the key is always to improvise right?

Alongside crochet, I dabble in a bit of cross-stitch, sewing, and more recently quilting. What do all of these things have to do with my post title? Simply that I have had quite a few people message me and tell me that although my stitching is good and (some) of my projects are passable, they are not always nice to look at.

Some of my projects are intended for myself, others are destined for greater places, but all are made to fit someone's personality. Usually when I start a project for someone I have them go over everything from the hook size to the finished size. I do this because what I am creating for them should be a one of a kind piece and should reflect them in every way. If they were getting something that I made to my tastes instead of theirs they could easily go to any store and buy something already made.

Not all the time do I agree with others about colors and what-have-you's, but I have to remind myself that this is is going to be someone else's gift and I will only have to look at it for a while. Question for this post, do you think it's ok for people to have such an opinion bout what you are creating for them, or should you do it to your own tastes?

I look forward to reading your comments. :)

Wednesday, November 6, 2013

Imperfections

Have you ever worked hard on a craft only to find out once you're almost (or already) finished that you made a mistake? What is there to do.... well, a few things come to mind.

#1. Leave it as is and ignore it
#2. Try to fix it as soon as possible
#3. Undo all the work you've done and fix the problem

My favorite is to try to fix it as soon as possible. Although there are occasions where you simply have to leave it and move on or take all the other work out to redo it. I hate that. :/ Below are a few samples of my mistakes, both in sewing and crocheting.


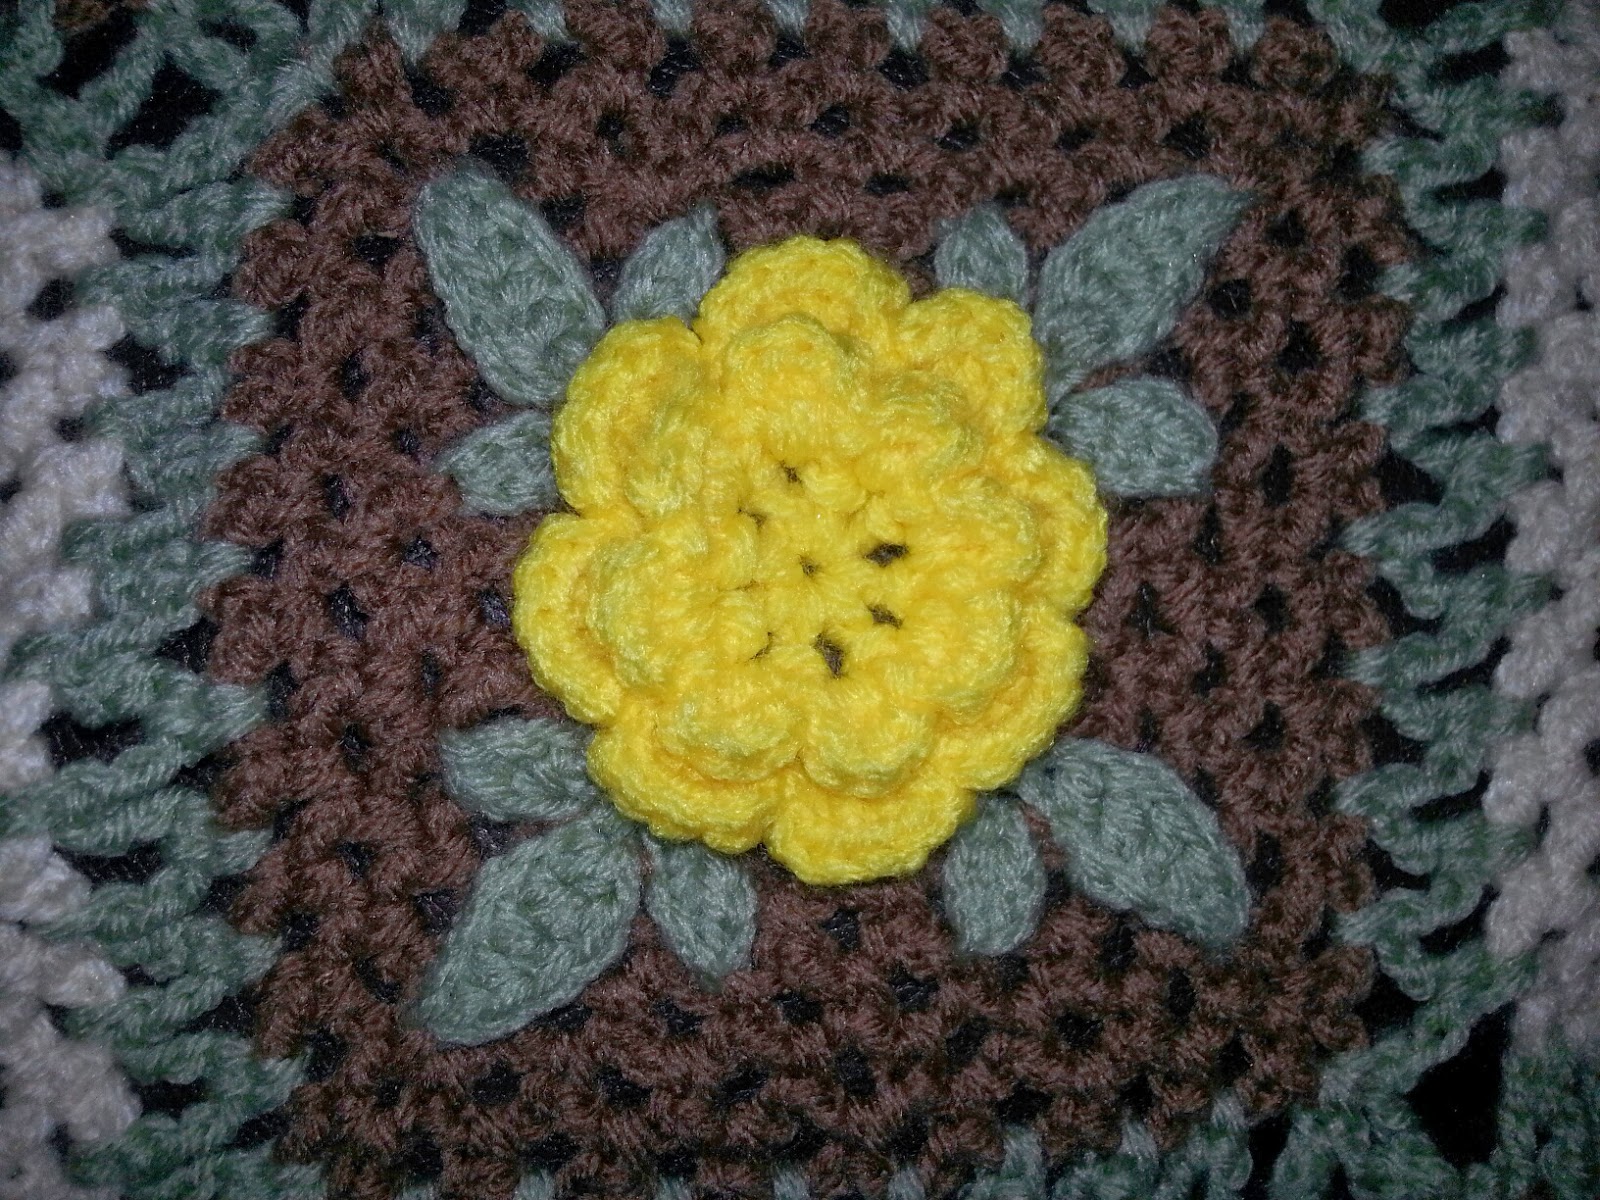
In this photo I crocheted an Irish rose square (you can find the pattern on another post on here) and you can see where, on the bottom right corner, I forgot to crochet one of the smaller leaves. I noticed this on the second row of the brown and by then I had done a bit of work and had a 2 yr old running crazy so it was so much simpler to just leave it.

Does it look bad? Maybe, but after attaching it to the rest of the blanket I asked a small group of friends to find one imperfection and only 3 out of the 9  people asked noticed it. 


This is another one where I did the exact same thing just in another color scheme and this time in the upper right corner. Both squares are part of the same blanket, yet this one was less noticeable than its predecessor.


This one is from the recent quilt I have been working on. My fiance bought me a sewing machine last week and this was my first attempt using it. All of this quilt is hand stitched except for this one strip. As you can see it is smaller on the top than the bottom, and the question is what to do about it. There are three answers to this question and I will tell you which one I will be doing.

#1. Cut both edges down until the whole quilt line is even with this ONE strip of fabric
#2. Pin it from the back and stitch it together until the bottom and top are even
#3. Allow a bigger seam allowance on the larger end of the fabric to get an even row

If you guessed #2, then you'd be correct. Unlike my crocheted squares, this one has to be fixed in order for the quilt to be pieced together properly. Numbers one and three might work, but look at how much of my blocks would be lost just to fix this one imperfection. That's a lot.


After completing my blocks I was so excited to start adding my filler fabric, that I completely "framed" this block. As you can see from the top, this was not a smart move. The fabric puckers and refuses to lie straight. There is no leaving it be nor fixing it later because when I add my side filler to the remaining blocks this fabric will pucker even more.

So, what's left to do.... you guessed it, take it out and redo. I was not happy, like I said, all hand stitched, but for the sake of the quilt it had to be done. I admit I did the wrong thing, but at least I know that my blocks will look good framed. :)

I really should make a sample of any project before I start it, then maybe I wouldn't be having all of these happy accidents. Oh well I like learning on the go, you don't get a practice swatch at anything else in life now do ya? :D

Just a nice filler picture :)

Now you have seen all three course of actions in two different types of crafts. Sometimes it's just easier to leave it, especially when you have a forgiving project such as the crocheted square. Other times it's better to fix it later as with the sewn fabric, and at others it's best to undo and redo. :) The choice is really yours.

Just remember that you will ALWAYS see your own mistakes, even when others don't, but it is the imperfections that make it so special to the one's that receive it. I should know, my Nana crocheted me a twin sized blanket when I was small. The yarn is different weights, there's a multitude of colors, and it's a bit uneven on the sides, but it's my most prized possession.

There is never a right or wrong way to any craft, there are loop holes to anything you want to do. Never be afraid to make those mistakes.


Tuesday, November 5, 2013

Roses of Ireland

I started this blanket in the summer time and I finished it some months ago but never got around to taking pictures. The blanket was meant to be a lapghan, but ended up going to a 6 year old so it worked out fine. :) Well, lets get started shall we?

I followed this pattern, but left off the scallops and single crochets because I really liked the open look and I didn't really want a "frame" around it. Maybe I might go back and follow the pattern exactly, but maybe not.

To begin with, I made the center "rose". It looks something similar to the following picture....


Then I crocheted the leaves, these were actually the easiest part for me. :)


As you can see, the next step is to add the background. You can tell where I added one petal to many to my first flower (this was the first square made) but as I kept going I got better....


This is the second square I made. I used a light brown, not white, so it would blend nicely with my dark brown. You see what I mean about keeping the flower as the focal point and not "framing" it with all the extra?


So this was the last picture I took while I was working on it. If I can ever find what I did with the final result picture I'll post it on here. :(

As you can see, I joined my squares with the same color as the leaves. #1 I had more of the green left over than any other, #2 I thought it made it look more like a garden and the green wasn't as overwhelming as any of the other colors would have been. I joined them as soon as I finished each block.... I'm not sure if that counts as a join-as-you-go or not, but it made things much simpler.


I wish I could give you my pattern for how I joined these, but I really don't remember. I just made it up as I went. I wanted it to keep that open look it had from the background so I just made up a stitch and when I saw that it worked I kept it. :)

I really should have made a sample pattern of this before I started, but I was so eager to get going that all my mistakes are right there in the blanket for all to see. This really is an easy pattern and it works up great. It's perfect for any season and you can use any color scheme you want or stick with only one. That's what sold me on this project because I have a hard time joining my colors, but this pattern makes it so easy. :)


11/9/2013: Recent photo update....

This picture was sent to me by my ever loyal best friend so that I could show you what the finished project looked like.... :)

Isn't it darling!


Tuesday, October 29, 2013

Newest Project

I have tried to dedicate this blog simply to crocheting, mainly because it is honestly my first love and I'd rather do it than sleep most of the time, but I foresee myself veering from this very soon. As you may or may not know, I have been trying my hand at quilting.... so far it has been simple mini pillows, but I am in the works of creating my very first hand stitched quilt.

I first learned how to do a  running stitch (straight stitch) while in my 6th grade art class. For one of our projects my teacher showed us how to hand cut, iron, piece, and sew our own throw pillows. I got a 89 which I'm still secretly proud of. After this, I hung up my needle and thread and never tried to sew again until earlier this year when I was determined to crochet a few purses. All of my work is hand stitched, no sewing machine has ever been under my fingers and the work shows it, lol.

I want to post my work here as well without creating yet another blog for this, although I do want to keep my book reviews on a separate page. It's just easier that way. I have all of my mini pillows posted on my Facebook page under the album "Completed Crafts" which you can find here : Click Me! and also on my Google+ profile which can also be found by clicking here : Yoo-hoo, over here!!!!. My ultimate goal is to get so comfortable and to hone this skill enough to make an interlocking wedding ring quilt (by hand) like my Nana used to make.

I do have to give credit where credit is due and thank all of my Google+ friends for dealing with my insane and never ending questions about every step I took to make these, as well as Missouri Star Quilting Company for their brilliant YouTube tutorials.... They are located here. :) Between 4 children (aged 3-11), a fiance, household work, school, writing, crocheting, and as always reading, I have yet another thing to add to my daily regimen.

So, ladies and gentlemen, I bid you adieu with this last phrase.... happy crafting everyone!

Tuesday, September 24, 2013

Back in the swing of things....

Since the move last month everything (save for a few of my books) have remained in their boxes. I have finally unpacked enough so that I can get back to what I do best, crocheting. There is so much I want to do but with a 3 year old, the addition of 3 other children, and a wedding to plan I don't seem to have much motivation at the moment. The good news is that fall is quickly approaching and I can't wait for the cool autumn air as well as all those beautiful colors. Autumn truly is the most inspiring time of the year.

Now, all my preparation and sacrifice will finally pay off and I can pick up where I left off, although I do have some projects lined up. :) I feel I will never be able to get caught up. I have 10 new books on my dresser, 18 on my Kindle, 30 on my e-reader, and 8 projects lined up before the end of the year. I know these numbers will only increase as the year progresses, but what can I do really? *shrugs shoulders* There is so many wonderful things to learn and do and I feel I will never have the time to complete them all.

Wish me luck fellow bloggers/crafters. I am going to need all the help I can get. :)

PS: I plan on using  few weeks at one point to do nothing but improve my skills. I will be making swatches of patterns that are either labeled advanced or intermediate. It is time to branch out and stop playing it safe.

Friday, June 21, 2013

Camo Wrist Purse

For those of you that have been following me this whole time, you are aware that my crocheting is not up to par yet, but practice makes perfect. Well, I decided to try my hand at these granny triangles. I found a great tutorial here.
I saw how she had her triangles arranged to form a type of circle so I thought, hey I can do that! So I began attaching all of my triangles together, but once attached I feared that I would not be able to recreate this circle so I just folded it in half and made this dainty coin purse.


Isn't it cute! And believe it or not but my snaps on the inside are centered and even! I'm so proud of myself!


So, ok it's not the best.... not even by a little bit. But, my heart is in this one and you have to admit that it is kinda cute. Somewhere there is a 5 year old who will cherish this like it was made of gold. :) That's it for today and as always....  Happy Crocheting!

Thursday, June 20, 2013

Another Little Lady.... In progress

Since my first attempt at my Pink Lady, I have been itching to get back to it and make it perfect. Well, as you can see that is not the case, because she is far from being perfect... She is still going to be fabulous! Lol By the way, in case you missed it, or if you might be curious, that stranger slender thing resting behind her is my trusty stitch marker bobby pin! See my post all about it *HERE!*


So, as you can see, I have already attached both of her feet here as well as finished the entire of her body. On to the head!.... :/


I have to apologize for this picture, but I couldn't very well leave it out could I? I had her big head almost finished and I wanted to take a picture of my progress for your viewing pleasure, but my headphones decided to make an appearance so now you see my work as well as you now know that, even though I am quite literally borderline tone deaf, I listen to music. I love this female instrumental group named Bond. :)

Ok, back to the crocheting.... :) 


This is my dolly all finished except for her arms and face. I hate doing her arms.... they are so tiny and insane to stuff. Never fear though, I shall give her arms, but this time she will be bald. She is to be donated to our local hospital where there is a little girl with cancer. Knowing that her doll is beside her, with no hair, will help  ease her embarrassment over the loss of her own.

This will also be my last doll for a few weeks, I want to try my hand at something else.... I'm always open for suggestions :)

The Latest in Crochet Couture :)

My sister has been hosting these "lady parties" recently. What is a lady party you might ask?.... well, it is a get together of women who are a range of ages and backgrounds who get together in order to buy all of my sisters stuff. :) Why would anyone do this???? Because I give her all of my crochet stuff and she has a more sophisticated version of a yard sale! :)

Anyway, my sister asked me to make a purse for one of her "lady's" daughters. The first thing that came to mind was that it's almost Summer (although in Rural Georgia it's been feeling like Summer since the end of April) and bright colors are still in. Seeing as the girl is only about 7, I made this one nice and simple. Enjoy!


So here is the body of the bag, the strap had fallen behind so it looks like it is missing. Oh well.... anyway, I double crocheted this as one piece and then folded it in half. I whipstiched the bottom and side up and discovered that I had ALOT of white yarn left. Do I cut it off? Are you crazy, and waste all that extra yarn?!?!? I don't think so.... What do I do but grab a smaller sized crochet hook and began making some strange loops with my leftover yarn.

She's 7 and she loves it so :p (for those of you that don't know, that is a playful face with it's tongue sticking out)


So this is the inside of my masterpiece all finished! Since I had such a hard time with the button last time I thought "what about snaps?" Well, I lined it up perfectly and all, but somehow between the hammering and my 3 year old it is off centered. Not to worry, the bag is still functional and it looks fantastic. The 7 year old owner of this bag smiles and tells all her friends that they are "late" as she calls it because their purses snap in the middle and hers snaps on the side. :) I love kids! 

Well, this is my creation, please feel free to send any comments my way. Constructive criticism is always welcome. :) Happy Crocheting! 

Monday, June 17, 2013

A revelation!

So, as I was working on my newest creation I discovered that the stitch markers my cousin had been using (and that I innocently borrowed) were a real pain in the neck! Naturally, I went back to using the bobby pins..... here's where it gets good.....

I was taking pictures of what I was doing so that I could help my cousin in a step-by-step tutorial when she pipes up and askes me why did I have a bobby pin on my work! I explained that it was my makeshift stitch marker and began to list the following reasons as to why bobby pins make better markers than ACTUAL stitch markers.

1. They are cheaper in price, but larger in quantity.
2. They do not snap as easily.
3. The can easily be maneuvered and adjusted,

She looked at me as if I had gone mad! *sigh* For all of you out there who have been using regular stitch markers, DROP THEM LIKE A BAD HABIT! You will thank me later. :)

Thursday, June 13, 2013

Pink Little Lady

First, I have to say that I downloaded this pattern from here so this is not my original pattern.
Second, I have to apologize for this looking as it does, but I am so excited to show this "little lady" off because she is my first amigurumi project! Without further ado...... I present for your viewing pleasure, Pink Little Lady!


Ok, so this is her about half way through. I was doing good at this point..... remember that. :)


And here she is folks! Ok, I added her hair but it looked too much like my own so I braided all those tiny strands together and kept braiding until she had 2 braids on either side of her head.

I had the best time making her and my little man has given her the name Abigail. :) I wish you could see the sparkle in the black yarn, it really makes a difference on the actual project. I know she's ugly, but she is my baby and that means she can never be ugly to me, lol.

Sunday, June 9, 2013

Crochet Bag

This is my first attempt at a crochet purse.... well, actually, the owner of this is using it as a bible cover. :P


After a lot of moaning, grumbling, sighing, and bleeding.... this is how it all turned out. Other than the button I am pleased with how this looks. This was the only button I had left and my zipper would not hold to the soft yarn I used. :( All is well though, it's owner is quite proud and tells everyone who made it for her!

Marleigh's Newborn Blanket

As my earlier blog stated, I had to make two blankets for sweet Marleigh.....


I used a size 4.25 mm hook and ww yarn. Any hook and yarn will work though.


I crocheted 8 squares of each other and attached them together with a single crochet seam. I then added a row of granny squares in white the combined squares. After this, I made a shell stitch into each ch-sp and fastened off. Ta-da!


Here's the finished product laid out. By using the variegated yarn I was able to take a simple pattern and make it completely unique.

Marleigh's "Tummy Time" Blanket

A beautiful baby girl named Marleigh entered this world on my birthday so I just had to make her a baby blanket. The more I thought about it the more I was convinced I needed to make 2 blankets. The first would be a simple "tummy time" blanket and the other would be her newborn blanket....


I used a stitch called the Dermot Filet Stitch. The pattern can be found in the book "Crochet Stitches Visual Encyclopedia". It is a fast and easy stitch to learn and once you get past the first few rows there is no reason 3to look back at the pattern.


Once completed, this is the blanket laid flat.


And here is a close up of the stitches. A single crochet border in a contrasting color finished off this simple blanket. :)